Tampilkan postingan dengan label excel. Tampilkan semua postingan

Excel 2010 - Add times together (duration)

Posted by Unknown Selasa, 19 November 2013 0 komentar
Introduction
I had a number of videos of varying duration. I wanted to find out if I watched all the videos one after another, how long they'd all take. I needed to sum the duration of the videos. At first I put the values in Excel in the format mm:ss (minute:second) but Excel didn't like that. I found that it works if you enter the times as hh:mm:ss (hour:minute:second).


Instructions

Enter the values hh:mm:ss - even if your values are shorter than one hour, as mine are, make sure you enter them as shown here with a preceding 00.

Select all the cells including an extra one, this will be the total.

Format the cells as Time (as shown in the above screen shot).

Click in the empty cell at the bottom and click AutoSum

You should end up with something similar to the following:


More help?


Baca Selengkapnya ....

Combine two CSV files into one using the Command Line (batch file)

Posted by Unknown Minggu, 20 Oktober 2013 0 komentar
Introduction
Batch files are still useful! Often we need to perform some routine tasks over and over. There are macros, scripting languages (AutoIt) and other solutions - but what about using batch files? In this article I will explain how recently I needed to combine a couple of CSV files regulary.

IMPORTANT: This article is only a guide, the steps in it are specific to my requirements but I hope the principals maybe of use to you!


Scenario
The BI (Business Intelligence) software we use at work output files as CSV (Comma Separated Values). This is great for opening in Excel and using pivot tables with. However, the BI software outputs only one year of budget figures at once. If you want to compare figures from year to year you must run a report for each year you need. You can then add these files together to make one big Excel worksheet. This procedure is not difficult, you can copy/paste the data from one CSV file to the other. However, wouldn't it be great if you could just run a batch file for this to be done for you, automatically?


Think and Plan
Before I did anything I had a good think about what I wanted to do and how I was going to do it. You need to understand each step in the process and think of a way to automate that step in the batch file.

I opened the CSV file in Notepad and took a look at it. The first three lines were title text telling me what the report is - this can be removed as it's not needed. Line four is the header, the column titles. This is important so I must keep it. This means I will need to find a way to delete the first three lines of text from a text file.

Imagine the second CSV file, this also has the first three lines of text to be deleted. But also line four, the header is not needed in the second CSV file because it will be added to the first CSV. This means I also need to delete not three but four lines from the second CSV file.

The last thing to do will be to add the two files together and to check everything is fine.

I decided to rename the CSV files to a.csv and b.csv. That way the batch file will just refer to those file names and in the future I will not have to keep editing the batch file to change the names again.


Delete lines from a text file
The MORE command outputs the contents of a text file. It has a switch /E that means it outputs everything but the first x number of lines. Using this we can create a new CSV file without the first three lines.

MORE /E +3 a.csv > tempa.csv
MORE /E +4 b.csv > tempb.csv

The above code worked for me. The first line removes the first three lines (rows) from the a.csv file. It creates a new file called tempa.csv

The second MORE command removes the first four lines from the b.csv file. A file called tempb.csv is created.


Combine two files
COPY tempa.csv + tempb.csv tempCombined.csv

The above command will copy the two files tempa.csv and tempb.csv into one new file tempCombined.csv.


Delete a blank line
There is a little problem with the tempCombined.csv file - a blank line appears in the middle between the sets of data. If you used the tempCombined.csv file in Excel you'd have a blank line which would show up when using pivot tables. We need to delete the blank line...

TYPE tempCombined.csv | FINDSTR /v "^$" > Combined.csv

The TYPE command outputs the file and the "|" pipes the output into the FINDSTR command. This looks for the string "^$", it means blank line. Output the result to Combined.csv, done!


The Finished Batch File
@echo off
echo.
echo Combine two CSV report files into one
echo.

echo Remove titles rows...
MORE /E +3 a.csv > tempa.csv
MORE /E +4 b.csv > tempb.csv

echo.
echo Add the CSV files together
COPY tempa.csv + tempb.csv tempCombined.csv

echo.
echo Delete blank rows
TYPE tempCombined.csv | FINDSTR /v "^$" > Combined.csv

echo.
echo Delete any previous temporary working files
del temp*.csv

echo.
echo Finished!

Copy and paste the above into Notepad and save as Combine2CSV.cmd.


Conclusion
I save my reports as a.csv and b.csv, double click the Combine2CSV.cmd file and it makes Combined.csv! Open that in Excel and it's ready to insert pivot tables. This saves me some time and hassle. I hope it will help you too or at least parts of this article may be of help in what you want to do.

Baca Selengkapnya ....

Insert a graphic from Greenshot into Excel, it doesn't appear on other computers

Posted by Unknown Senin, 26 Agustus 2013 0 komentar
Introduction
I used Greenshot to capture a screen shot then I inserted it directly into an Excel workbook - everything looks fine. I saved the workbook as xlsx and e-mailed it to a colleague. The colleague opened it only to find the following:
The linked image cannot be displayed. The file may have been moved, renamed or damaged.


This usually would appear if you just link rather than inserting the image into the workbook. However, I had inserted it from Greenshot - I often use Greendshot to insert screen shots directly into Word without this trouble, what's going on? 


Reason
After a little searching on the web I found this:

There is a bug in: Greenshot 1.1.5 Build 2643, this is the current version, at the time of writing, August 2013. Greenshot is not inserting but linking to the image. We have to wait until 1.1.6 build 2741 for the fix. 


Workaround
Don't directly insert from Greenshot to Excel. Take your screen shot with Greenshot and first save, then insert the saved image file using Insert | Picture.


Baca Selengkapnya ....

Turn on the Developer tab in MS Office applications

Posted by Unknown Kamis, 22 Agustus 2013 0 komentar
Word, Excel, Powerpoint, Outlook, etc, have some additional features available on the Developer tab (ribbon bar). This tab is not turned on by default. Follow these steps to turn it on:

Click File | Options 
Click Customize Ribbon

Word 2010 Developer tab

On the right look through the list of Main Tabs and click to enable Developer (as shown above).
Click OK

If you are using Word you'll see the following:


It's similar for Outlook, Excel, PowerPoint and other MS Office applications.


NOTE: This applies to MS Office 2010 and 2013.


Baca Selengkapnya ....

Excel 2010 - Compare two worksheets using Spreadsheet Compare

Posted by Unknown Jumat, 05 Juli 2013 0 komentar

Introduction
I had two Excel files and I wanted to compare them to see the differences. Excel 2010 doesn't have a way to do this included. I had a look on the web and found a free add-in for Excel called Spreadsheet Compare.


Download and Install
You can download it here: http://sourceforge.net/projects/spreadshcompare/
Once it has downloaded open the EXE and follow the prompts to install.
After installation, when you start Excel the next time, click the Add-ins tab. You'll have a Compare button.


Using Spreadsheet Compare
Let's suppose you have two Excel files like this:


Make backup copies of the two worksheets you want to compare. This is important because Spreadsheet Compare will alter the worksheets you compare.

In Excel open the two worksheets you want to compare.

Click the Add-ins tab, click Compare.


Select the two worksheets - as you can see in my example above, my files are called Sheet1 and Sheet2.

Click Compare


When it's finished click OK


As you can see in the above, my Sheet1 and Sheet2 have highlights indicating the differences between the two files. The third worksheet explains in more detail. 


Conclusion
This add-in works! It does a good job and it's free, what more could you want? 


Baca Selengkapnya ....

How MS Office Word doc / excel / ppt edition on Kindle Fire HD / 2 free

Posted by Unknown Jumat, 15 Maret 2013 0 komentar

ad

Kindle Fire HD comes pre-loaded with Office Suite app. You can use Word documents, spreadsheets, power point presentations with the Office application. You can not doc or docx files. OfficeSuite Pro is edited possibilities, but costs about $ 15.

Editing or see doc / xls / ppt for free in HD Kindle Fire / 2
1. Download and install Kingsoft Office app on your Kindle Fire HD from Amazon AppStore

2. You may DOC / DOCX, XLX / xlsx, ppt / pptx files with. You can find documents on your Kindle Fire HD.

Kingsoft Office has integration with Dropbox, Google Drive (Google Docs), Box.NET. You can upload and edit files stored in cloud services. You can also use FTP your documents. You can send your edited documents directly from Office applications: Kingsoft.

I could another free application was not found for editing documents or Excel files on Amazon AppStore. There are some Android apps like Office Suite Professional 6 , Documents To Go Full Version Key , but they cost about $ 15 dollars

Also, how to use iTunes playlists import Kindle Fire HD / 2

View the original article


Baca Selengkapnya ....

Excel 2010 - Format as Table is greyed out

Posted by Unknown Senin, 21 Januari 2013 0 komentar
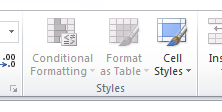
Today I was sent by e-mail an XLS file but that when I opened it the Conditional Formatting and Format as Table buttons were greyed out. I wanted to use Format as Table so I could more easily

Make sure you save the file as a real Excel 2010 xlsx. But in my case I found my file was 'Shared' and removing the 'Shared' status solved it for me. Here are the two solutions in more detail:


Convert to xlsx
On the top of the Excel window, to the right of the filename, if it says [Compatibility Mode] do the following:
Click File | Info | Convert
Save the file as xlsx (native Excel 2010 format)


Turn off Shared
On the top of the Excel window, to the right of the filename, if it says [Shared] do the following:

Click Review | Share Workbook

Disable (click to remove the tick) 'Allow changes by more than one user at the same time. This also allows workbook merging.'

Click OK


Click Yes


Click Home and you'll see the buttons are now active!


NOTE: You have to make a choice! If you received the file via e-mail then it should not matter that you have turned off Sharing. But if you opened the file from a shared network drive then you will stop it from being shared - other users will not be able to access this file until you've finished with it.


Baca Selengkapnya ....

Excel 2010 - Data source reference is not valid

Posted by Unknown Selasa, 28 Februari 2012 0 komentar
Problem
In Excel 2010, when you try to create a pivot table it give the following error message:
Data source reference is not vaild

Solution
Often this happens because you opened a CSV or other data file directly from another program.

Make sure you save your data file first, before you attempt to create a pivot table. It will work if it is a saved csv, xls, xlsx, etc.

Baca Selengkapnya ....
Trik SEO Terbaru support Online Shop Baju Wanita - Original design by Bamz | Copyright of apk zippy.